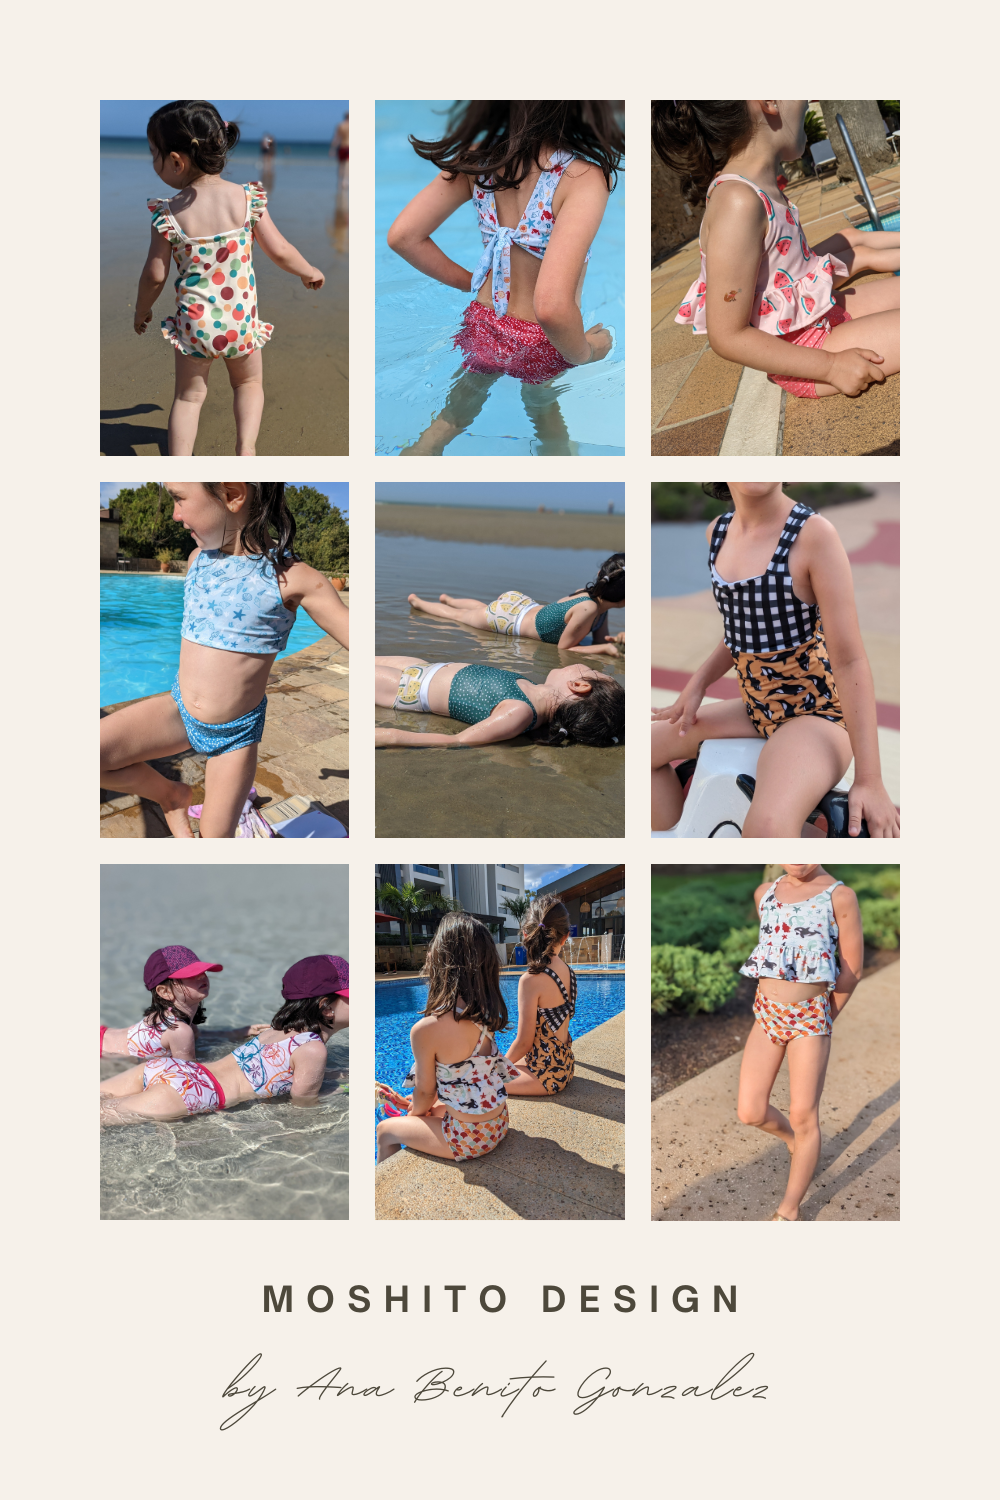
Make a splash: sew your own swimsuits!
In this blog post, we will explore the unique qualities of swim fabrics, discuss the main challenges you may encounter, and inspire you to create adorable and one-of-a-kind swimsuits for yourself or your little ones. If you're thinking about diving into swimsuit making but need guidance and encouragement, you've come to the right place!
Embarking on my own swimsuit-making journey a few years ago, I quickly realized that mistakes were bound to happen. However, with a growth mindset, I knew I could improve over time. In this post, I'll share the tips and tricks I've learned along the way to make your sewing experience easier and more enjoyable. So, let's dive in!
Things to consider before getting started:
Type of fabric: I would choose specifically swim fabric because it’s engineered to withstand exposure to chlorine, saltwater, and sunlight. Look for materials such as nylon, spandex, or polyester blends with high elastane content for stretch and recovery.
Pre-wash your fabric: This is no different from any other fabric.
Cutting the fabric: Swim fabric tends to be more slippery that regular fabric so when it comes time to cut be careful.
Needle selection: I use a ballpoint or stretch needle designed for knit fabrics. These needles have a rounded tip that glides between the fibers without causing damage or skipped stitches.
Best thread: Polyester thread is the best because it is more resistant to chlorine and saltwater exposure than cotton thread. It provided better durability and longevity for your swimwear.
Extra pin your fabric: Swim fabric is very slippery so I would make sure I hold everything in place while pinning and also during sewing. Stop as you need to readjust the fabric.
Stitch selection: I would use a zigzag stitch to make sure your fabric can easily stretch as needed. You can play with the width and length of the stitch to ensure proper coverage.

It’s really not that hard but it takes a little bit of time and practice. To me the hardest part is attaching the elastic. You will need to add elastic to the legs and some other open areas, depending on the pattern, to make sure the fabric adjusts properly to your body. So, let me guide you quickly through the main steps.
I have outlined six steps to help you visualize the process more clearly, but ultimately, the best approach is to dive right in!
Step 1: Creating a circular shape with the elastic.
To begin, use a back-and-forth stitch to join both ends of the elastic and form a circle. Ensure the elastic is not twisted during the sewing process.
Step 2: Securing the elastic around the opening.
I recommend using a slightly wider elastic (around 1/4 inch is ideal) for easier attachment. Divide both the opening and the elastic into four equal parts, and mark these sections for reference. Pin the elastic to the opening, starting with these four points, and then add additional pins to stretch the fabric. When you release the fabric, it may bunch up, but that is perfectly normal.
Step 3: Attaching the elastic to the opening.
For this step, you can use either a serger (if available) or a regular sewing machine equipped with a zigzag stitch. Personally, I prefer using a serger because it trims any excess fabric (though there shouldn't be much). Take your time, making adjustments to the elastic as necessary. Keep in mind that the elastic may try to slip out of the fabric, so check periodically as you sew.

Step 4: Stretching the elastic as you sew.
When you begin sewing the elastic into the fabric, it's important to stretch the elastic to match the length of the fabric between the pins. Gently pull the elastic, ensuring that the pins remain securely in place. To maintain control, I usually hold onto the next pin and apply a gentle stretch.
Step 5: Sewing all the way around the opening.
Continuously adjust the fabric as you sew, progressing all the way around the opening. Once you've completed sewing, carefully cut the thread.
Step 6: Folding over the elastic.
Using a regular sewing machine and a zigzag stitch, fold the elastic towards the inside of the fabric. Stitch all the way around the opening once again to secure the elastic in place.

By following these steps, you will achieve a secure and professional finish. Remember to make necessary fabric adjustments as you sew and maintain control over the elastic.
Please, let me know if you have any questions or run into any problems. It’s very likely I run into the same issue, so I’d be happy to help!
Happy sewing and see you soon!
Ana