
Make two Pillows with just half a yard!
I wanted to make something special for my little ones. I always make them dresses and even they loved them (so far so good) I wanted to make them something special with one of my designs of their choice. A pillow! A comfy soft pillow they can snuggle at night…

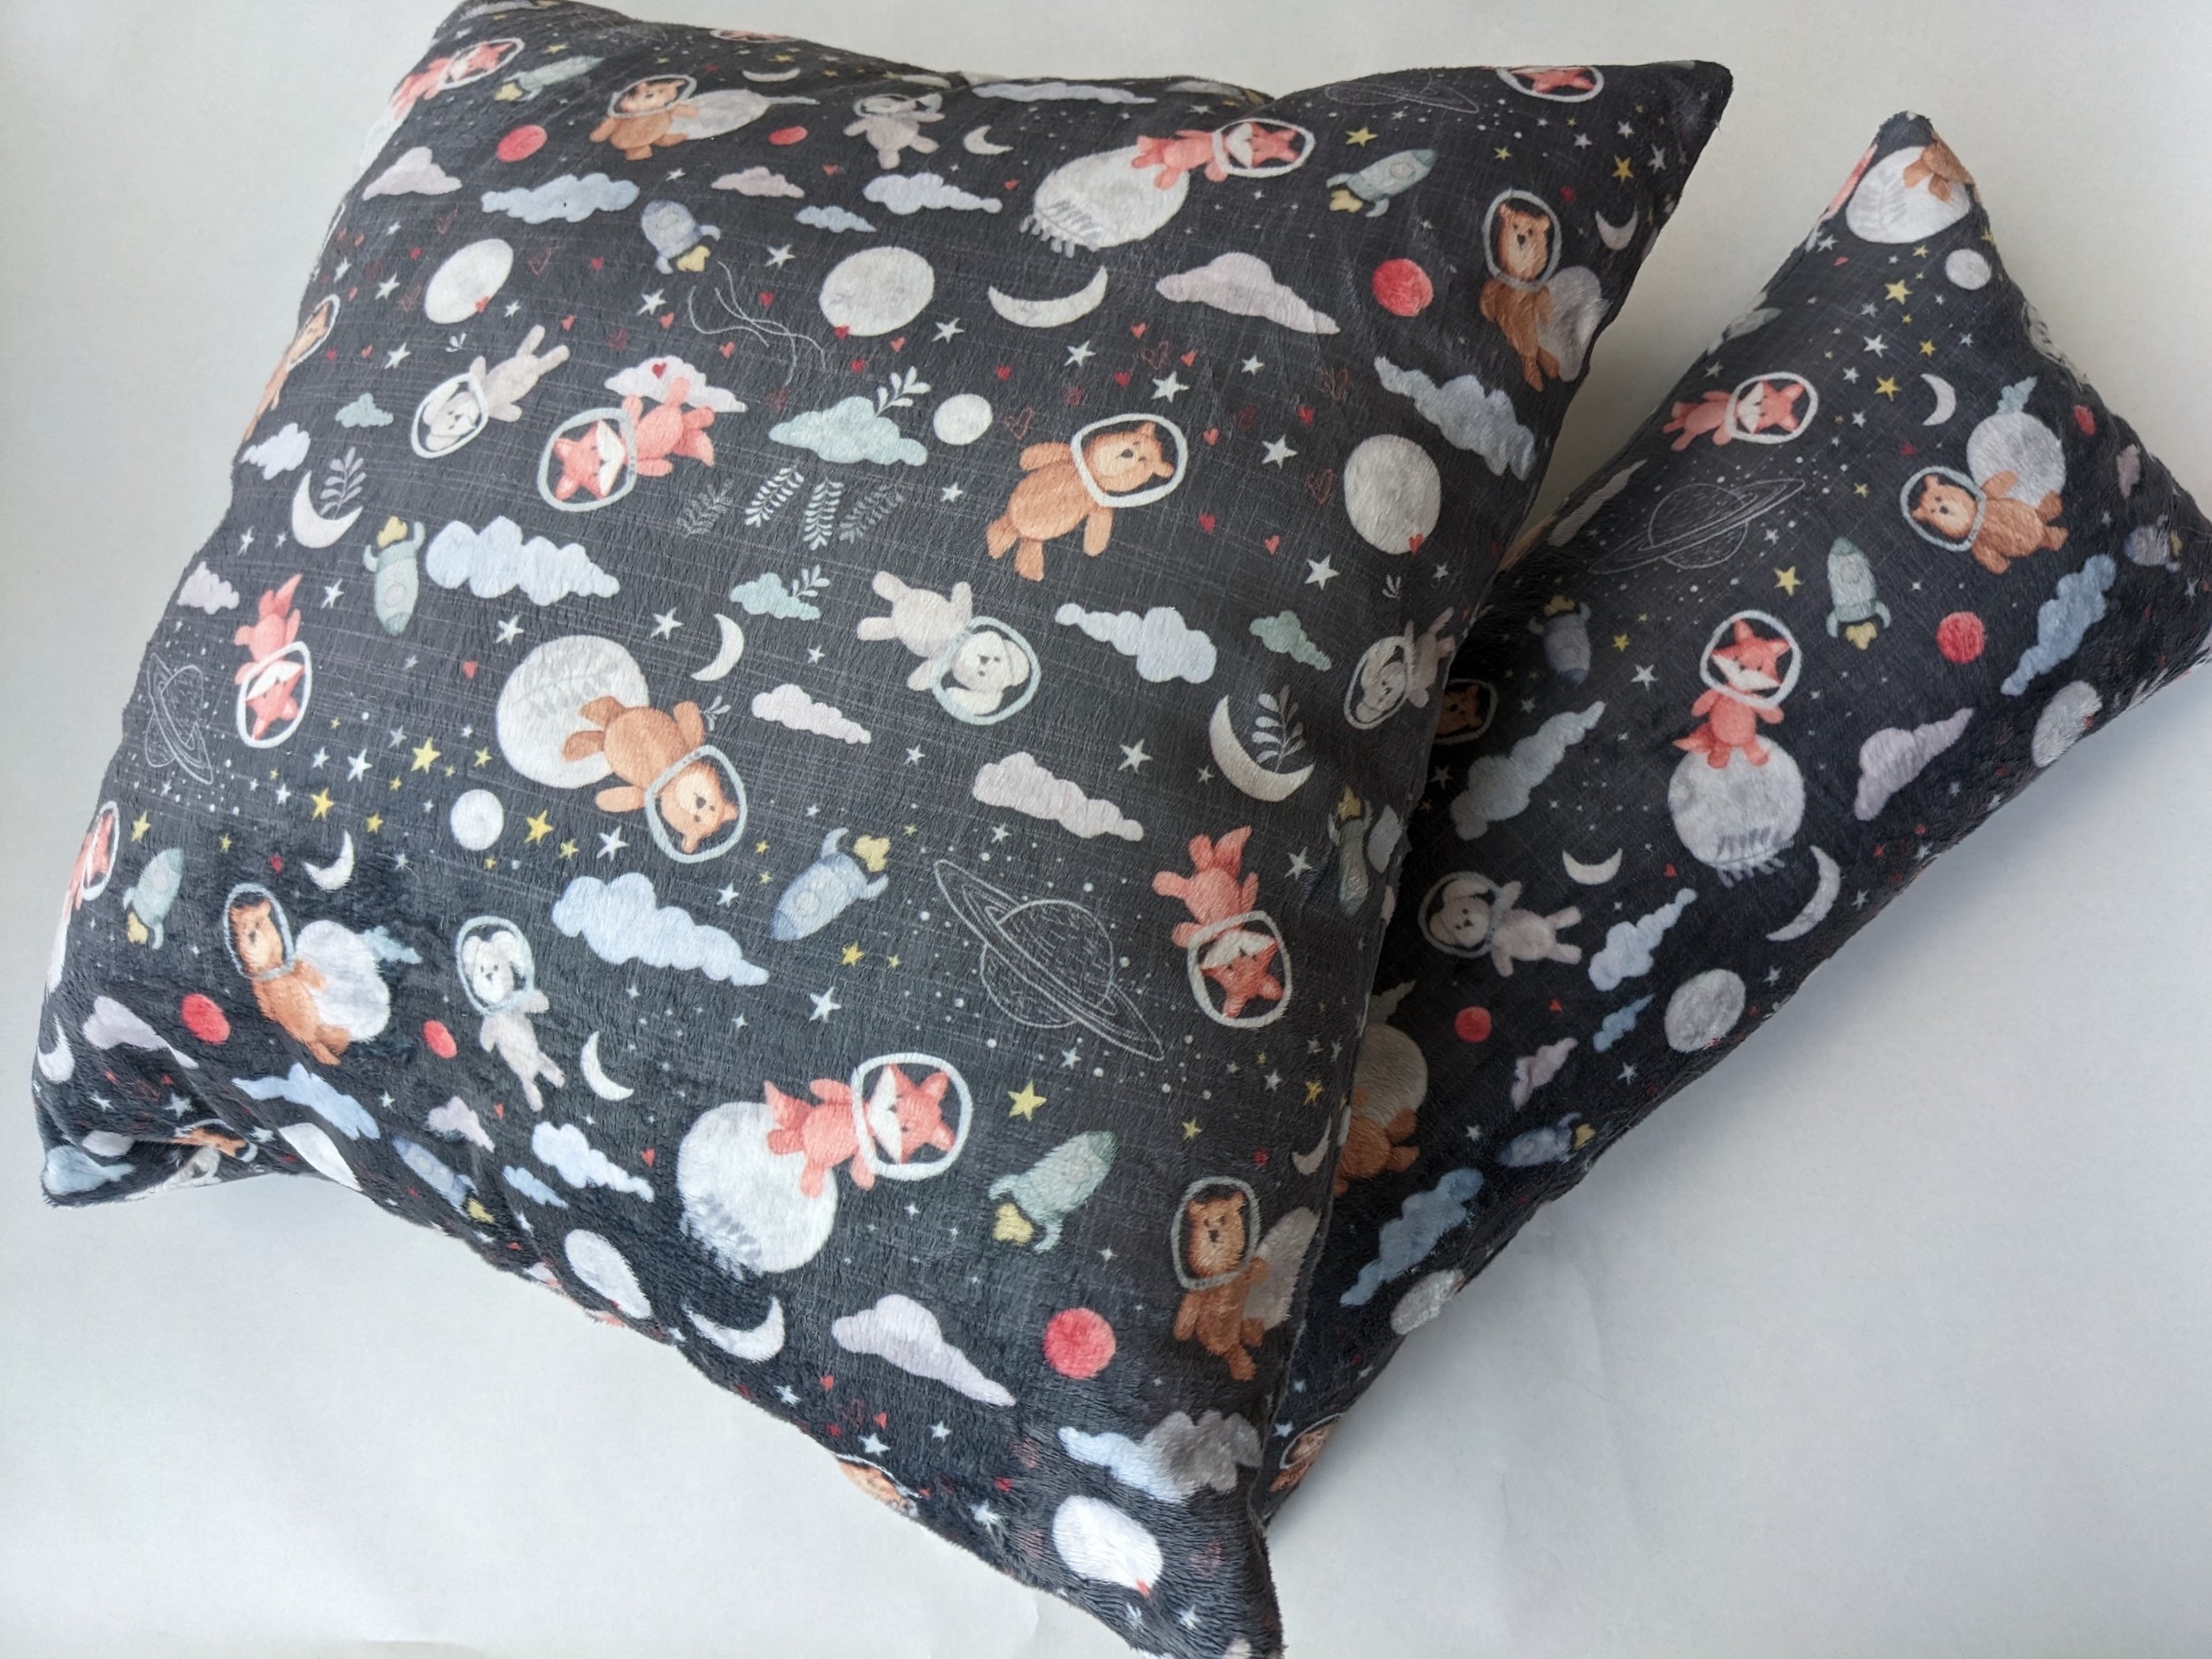
A pillow, that I made for them, that they can snuggle at night or use to be comfy on the floor while reading books (why do the choose to read on the floor instead of the couch is something my old bones don’t fully understand). My youngest daughter had the brilliant idea. She loves anything soft. So, we ordered the Minky (Cuddle) single-sided fabric from Raspberry Creek Fabrics. And oh, let me tell you it’s dreamy and SOFT!
The best news is that I only ordered a half a yard for each one of the designs they choose and made them two pillows:
My youngest chose Cosmic Dreams in dark blue.
My oldest chose Sweet Dreams in ocean blue.
But wether you have little ones or not, pillows are a fantastic choice for beginners and seasoned crafters alike. Not only are they functional and versatile, but they also provide an opportunity to showcase your creativity. In this tutorial, we will explore how to sew two beautiful pillows using just half a yard of fabric. With a few simple steps and some basic sewing skills, you can transform a small amount of fabric into delightful accents for your home.
Materials you will need:
Half a yard of fabric (minky, cotton, linen, or any fabric really of your choice)
Matching thread
Sewing machine (or needle if sewing by hand)
Scissors
Measuring tape or ruler
Straight pins
Pillow stuffing or pre-made pillow forms
Step 1: Preparing the Fabric
Start by washing and ironing your fabric to remove any wrinkles and ensure that it's clean and ready for use. If you use minky you skip this step.
Measure and cut two equal-sized pieces from your half-yard of fabric. These are the measures I used to use the entire half yard and make two pillows:
Square pillow: cut 2 squares of 18x18 inches
Long pillow: cut 2 rectangles of 20x9 inches

Step 2: Pinning and Sewing
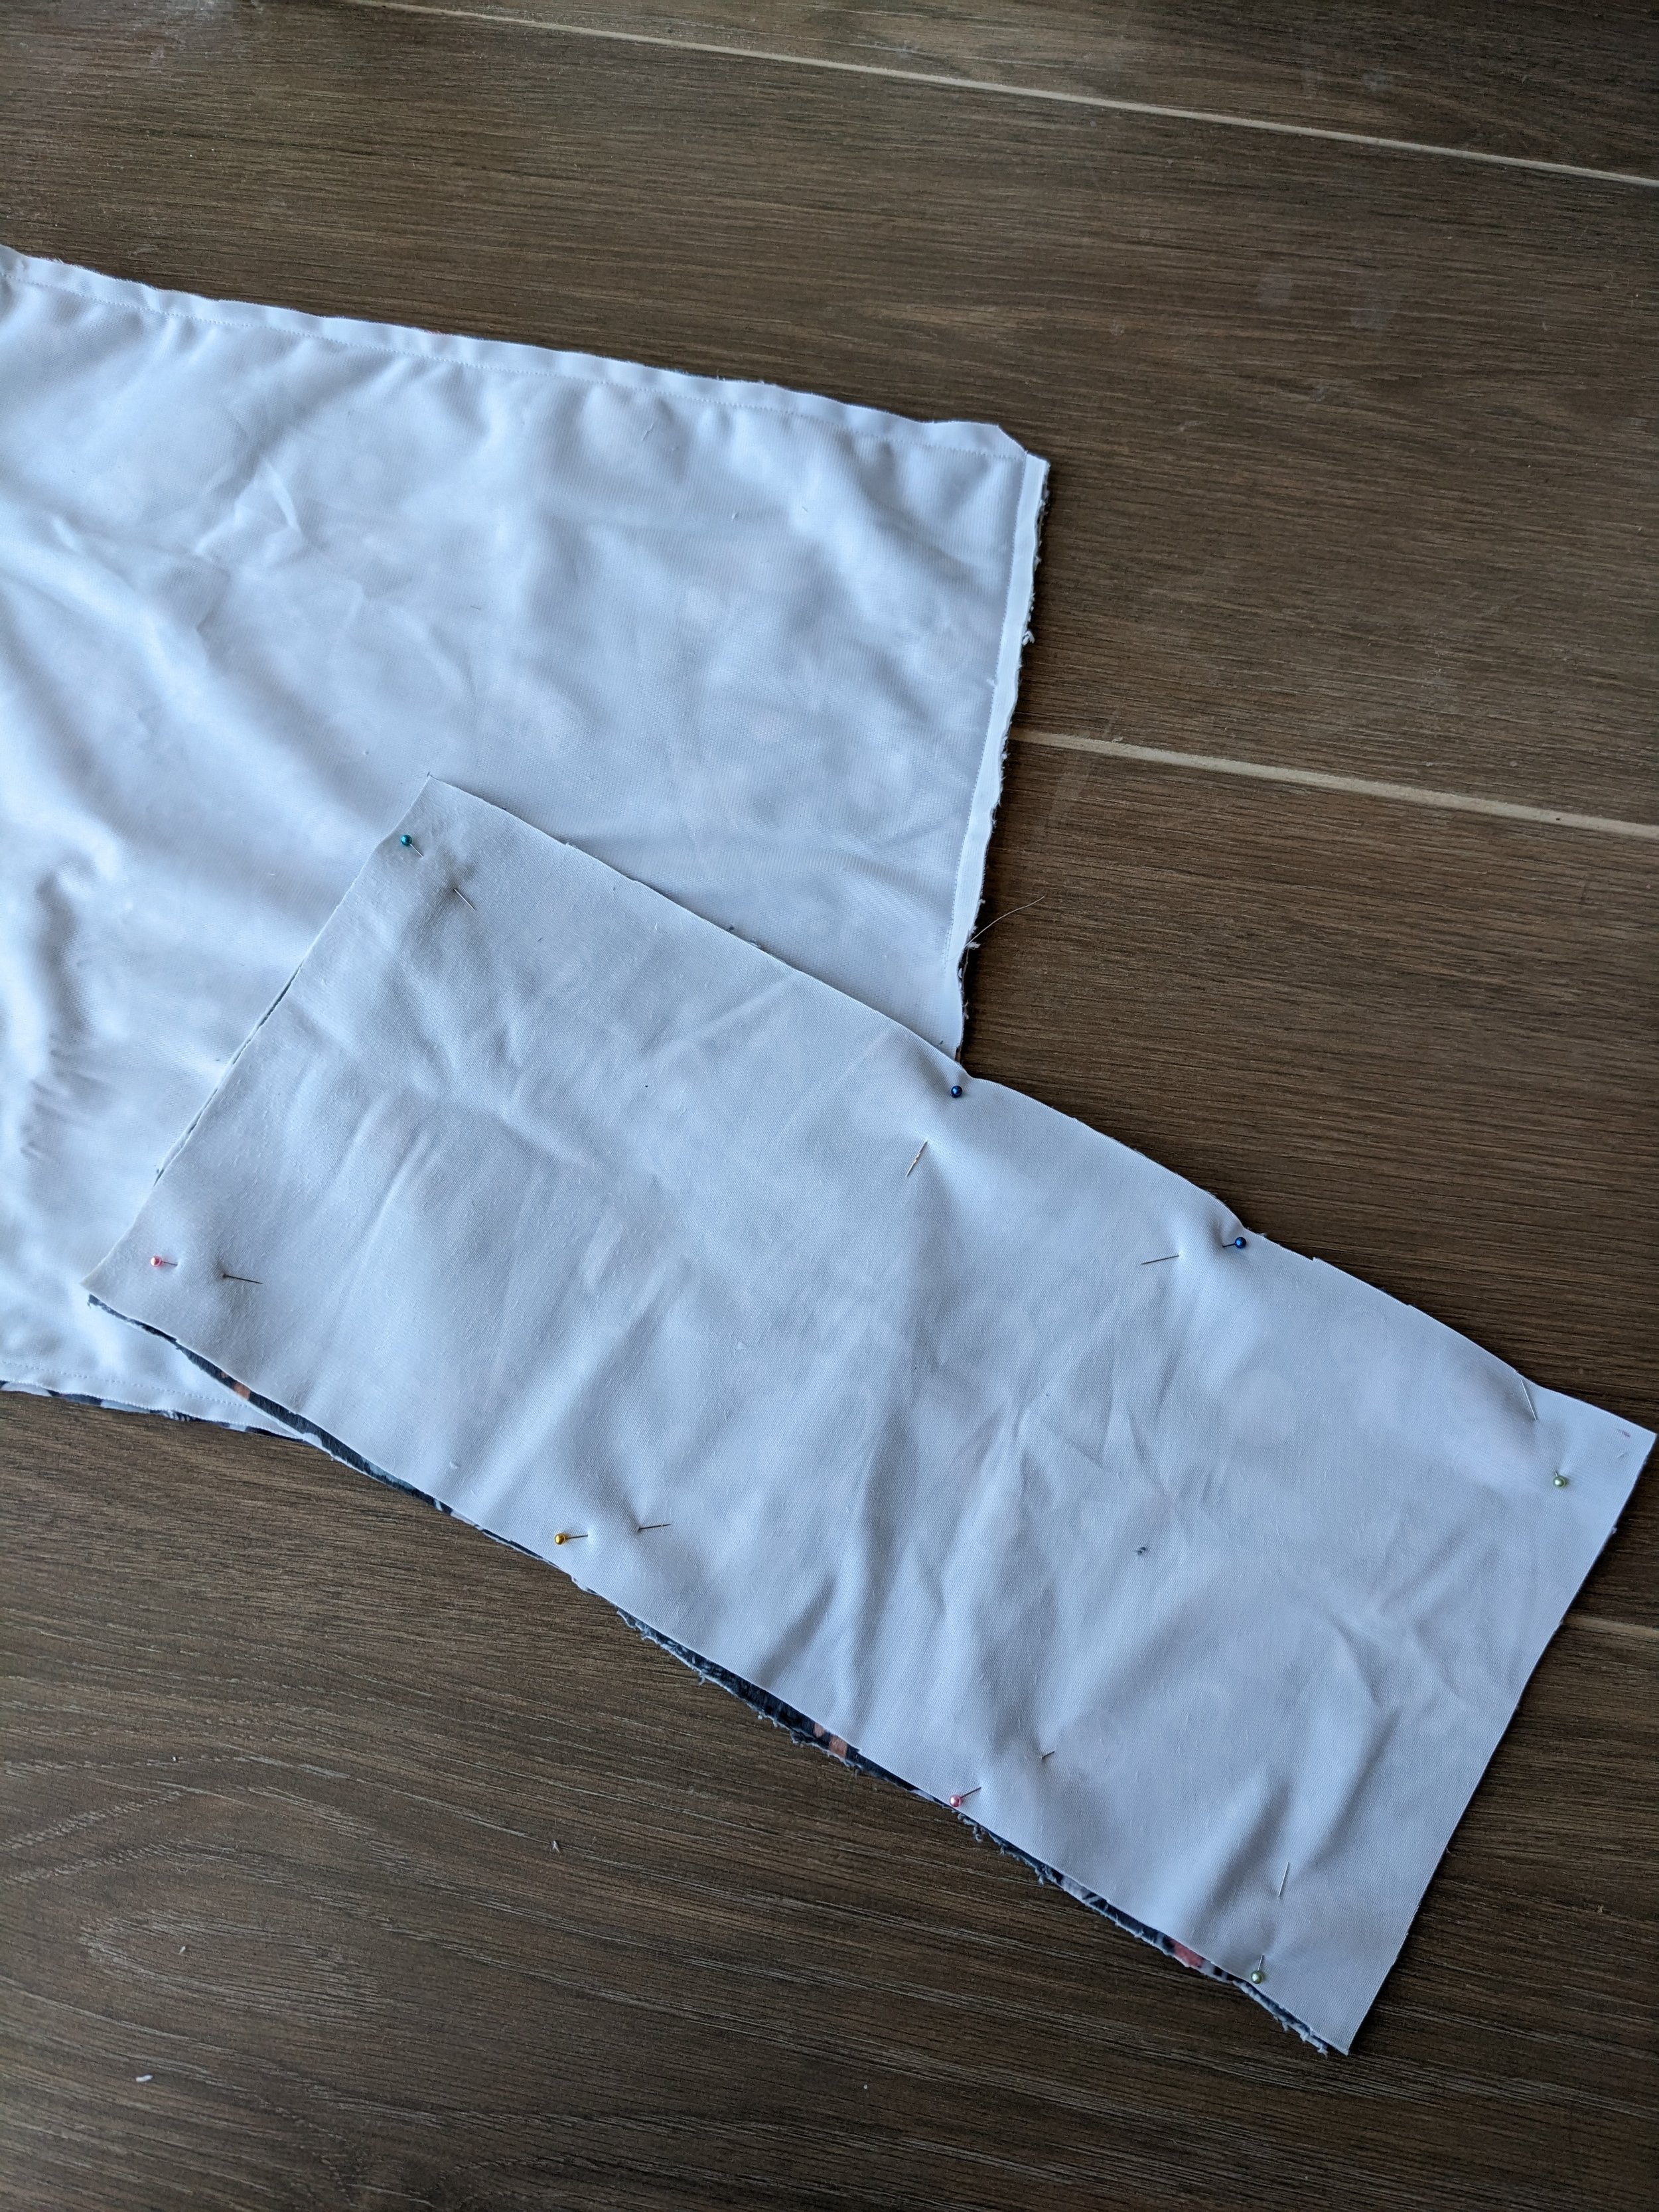
Place the two fabric pieces together with the right sides facing each other.
Pin the edges together, leaving a small opening (approximately 4-5 inches) along one side. This opening will be used later for turning the pillow right side out and stuffing it.
Using a sewing machine or needle and thread, stitch along the pinned edges with a ½-inch seam allowance, reinforcing the beginning and end of your stitches.
Remember to backstitch at the beginning and end of your sewing to secure the seams.
Step 3: Turning the Pillow Right Side Out
Carefully trim the excess fabric at the corners to reduce bulk when turning the pillow right side out.
Reach into the opening and gently push out the corners to achieve a crisp, squared shape.
Turn the entire pillow right side out through the opening, using a chopstick or a blunt object to push out the corners completely.
Press the pillow with an iron, ensuring the edges are flat and neatly aligned.
Step 4: Stuffing and Finishing
Fill the pillow with your desired amount of stuffing or insert a pre-made pillow form through the opening. Use your hands to distribute the stuffing evenly for a plump and well-shaped pillow.
If you're using pillow stuffing, avoid overstuffing, as it may lead to a lumpy appearance. For a firmer pillow, add more stuffing, and for a softer one, use less.
Once the pillow is adequately stuffed, hand-sew the opening closed using a slip stitch or ladder stitch. Ensure that your stitches are secure and hidden within the seam allowance.


I am so happy with the result and the girls love them and snuggle them every night! Sewing your own pillows is a rewarding quick project that happend to be also budget-friendly. With just half a yard of fabric and some basic sewing skills, you can create two beautiful pillows that reflect your personal taste. Remember to experiment with different fabrics, and patterns. Enjoy the process, unleash your creativity, and indulge in the comfort of your handcrafted pillows!
I would love to see photos of your pillows !

Happy Sewing!
Until next time,
Ana