
Sew Your Own Pouch: A Perfect Handmade Gift!
This year marked my third time participating in the annual holiday market hosted by the embassy in Nairobi, and I decided to shake things up with some delightful surprises! One of the biggest hits? This adorable square travel pouch.

While you might not have been able to snag one at the market, I’ve got exciting news—I'm sharing the complete pattern with you! That’s right, you can make this cute pouch at home, customize it to suit your style, and even gift it to friends and family for the holidays. It’s practical, stylish, and oh-so-easy to sew!
This is the cutest pouch pattern, it has plenty of storage, a few separarated compartments, and elegantly organized wide open space.
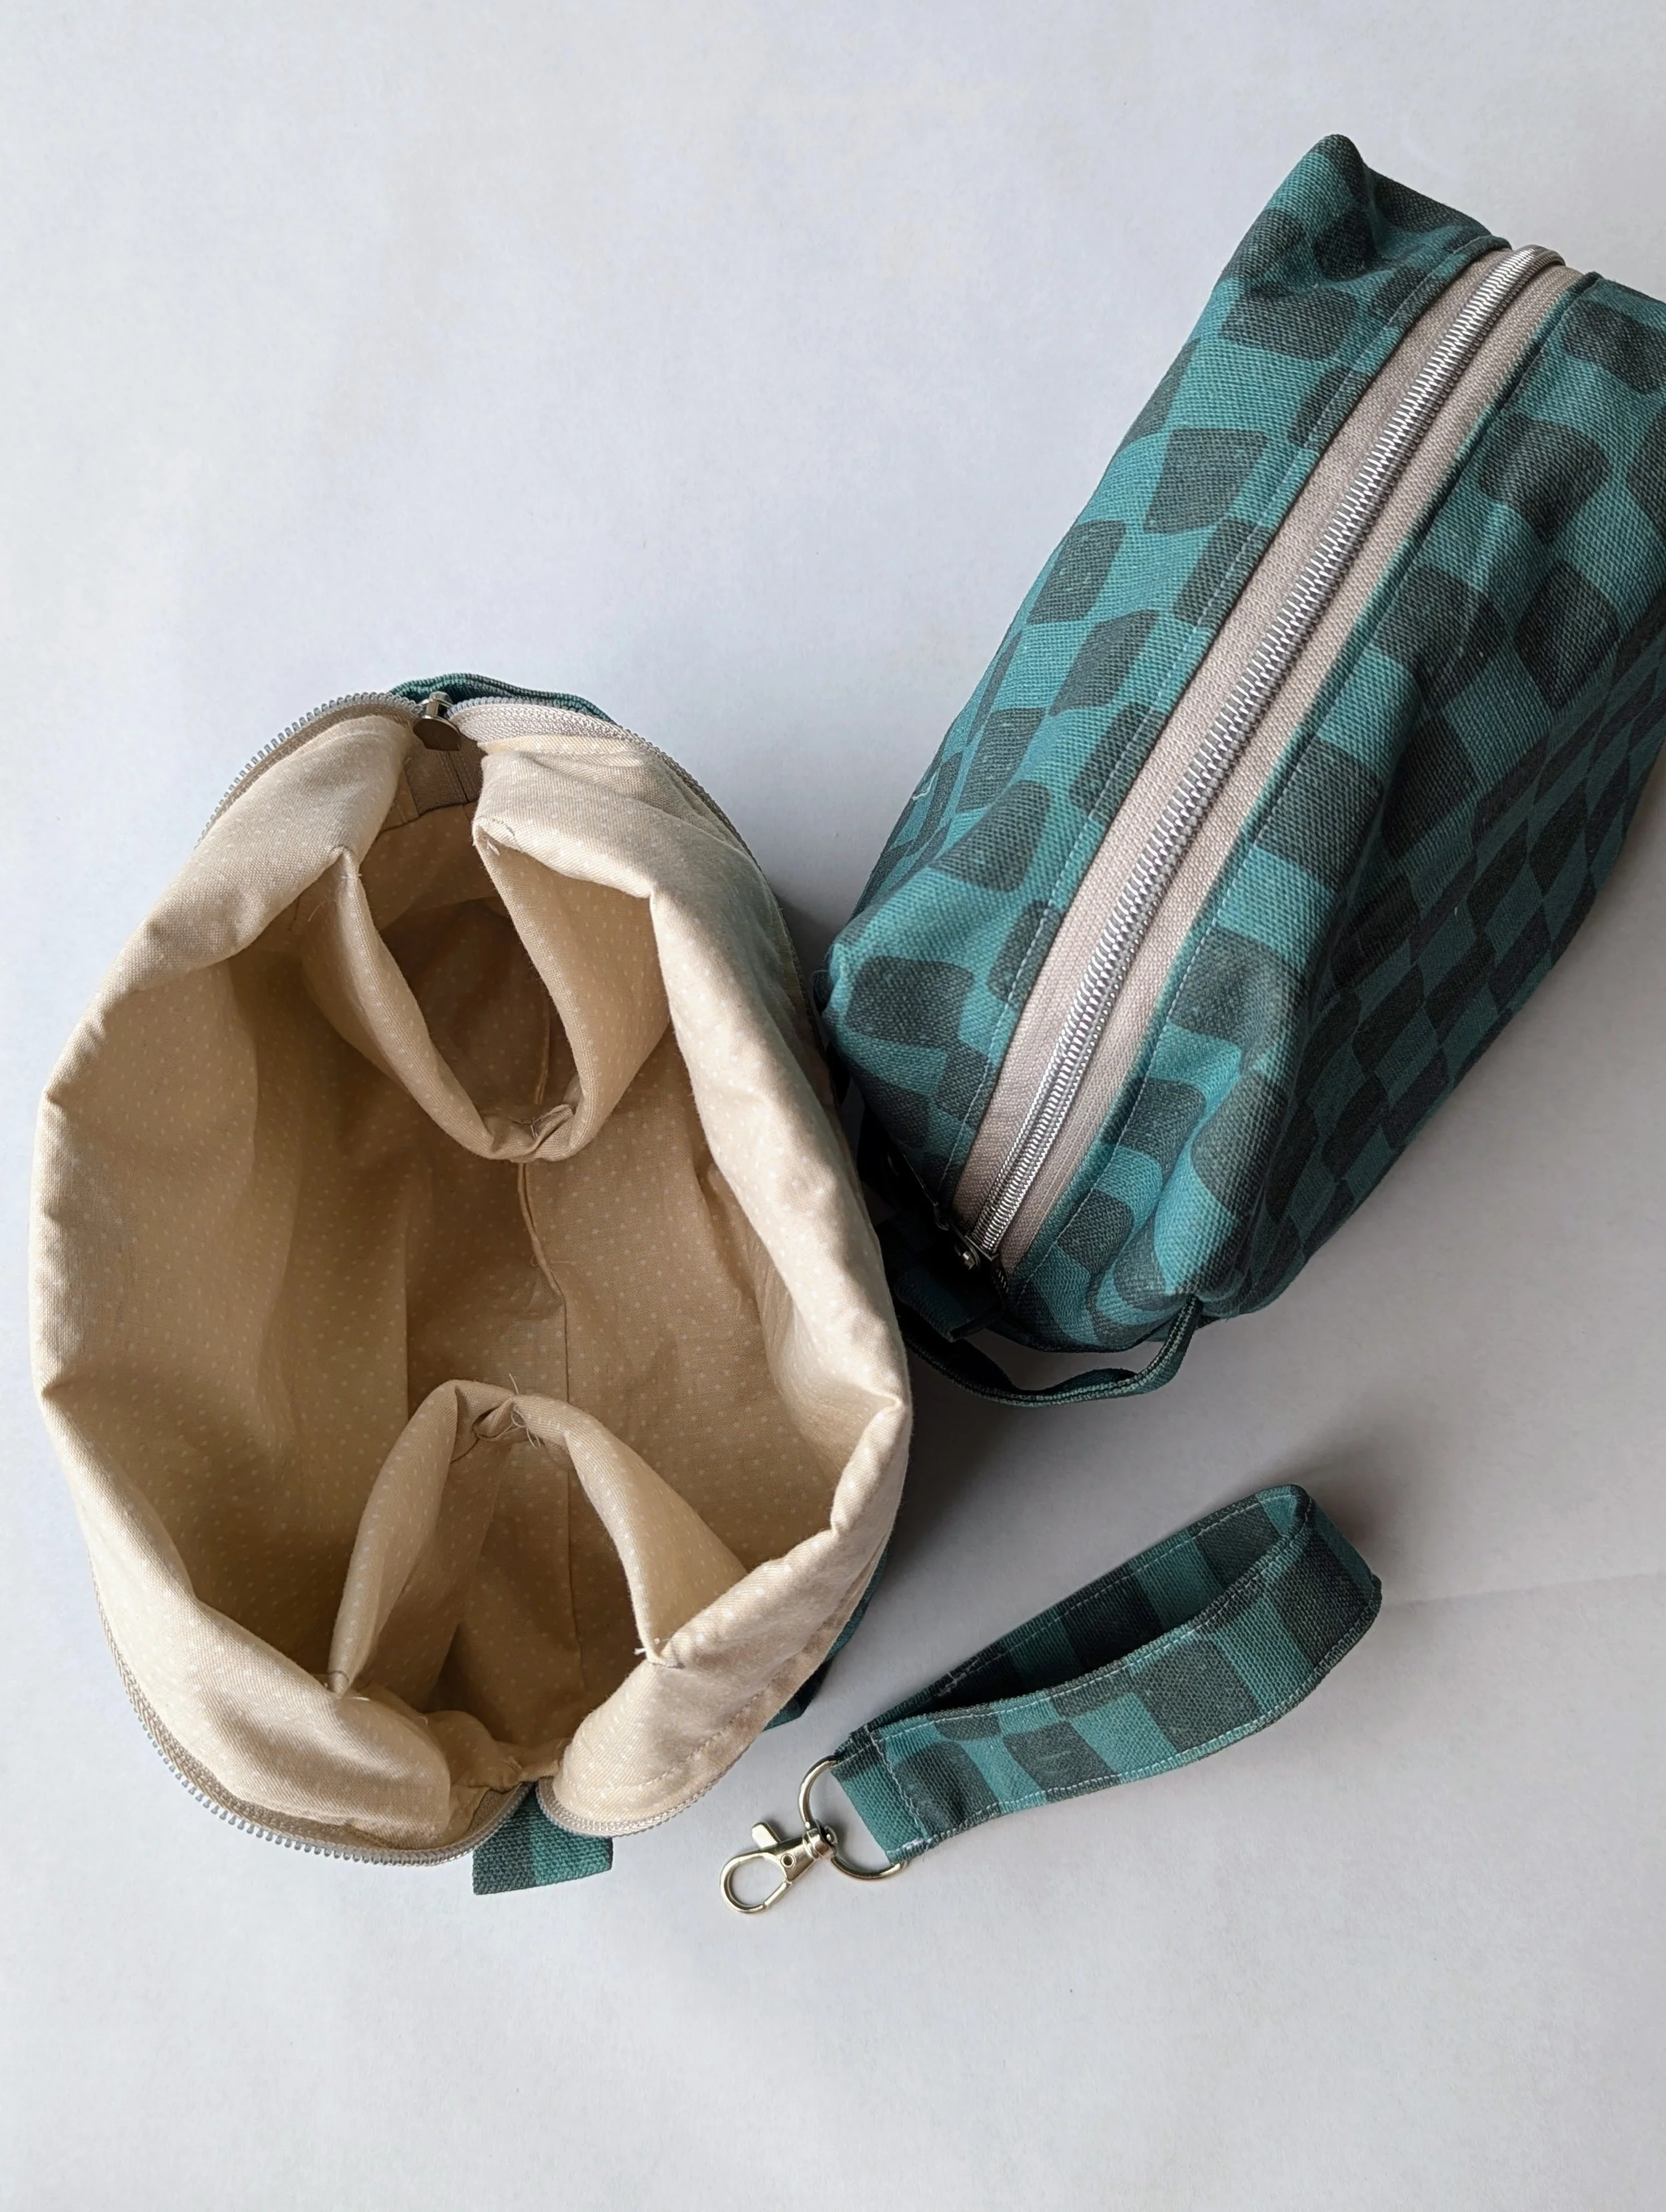
I love the small compartments in this toiletry bag, especially the padded pockets that allow me to store toiletries that need to stand upright securely. It keeps everything organized and prevents bottles from tipping over. Another feature I appreciate is the foldable top, which gives me quick and easy access to all the contents inside without having to dig around. I keep the bag right next to the sink, making it incredibly convenient to grab whatever I need while getting ready. It’s the perfect travel essential for staying organized and keeping my toiletries within reach!
What You'll Need
Here’s a quick rundown of the materials to get started:
Outer fabric: 2 pieces measuring 11"x15"
Inner fabric: 2 pieces measuring 11"x15"
Fusible interfacing: Light to medium weight, 10"x14"
14" zipper
Outer fabric strip: 1 piece, 3"x6"
Outer fabric squares: 2 pieces, 2"x2"
Step-by-Step Instructions

ATTACH THE ZIPPER
1.- Cut Your Fabric
Start by cutting all your fabric pieces to the specified dimensions. Don’t forget to iron the fusible interfacing onto the wrong side of your outer fabric for added structure!
2.- Prepare and Attach the Zipper
Assemble your zipper by attaching it between the outer and inner fabric pieces. This will create a clean, professional finish when the pouch is zipped up.
3.- Layer and Sew
With the zipper sandwiched between the outer and inner fabrics, sew carefully along the edge. Repeat this process for the other side of the pouch.
4.- Topstitch for a Polished Look
Press the fabric away from the zipper and topstitch along the edges to secure the seams and add a crisp finish.

Topstitch and then attach both the inner fabric and outer fabric.
ASSEMBLE THE POUCH BODY
5.- Match the outer fabrics together (right sides facing) and sew around the edges. Pin and secure both outer layers together and sew along the opposite edge to the zipper. Repeat for the inner layer. FOR INNER LAYER leave an opening in the middle (this will be used to turn the pouch inside out at the end).

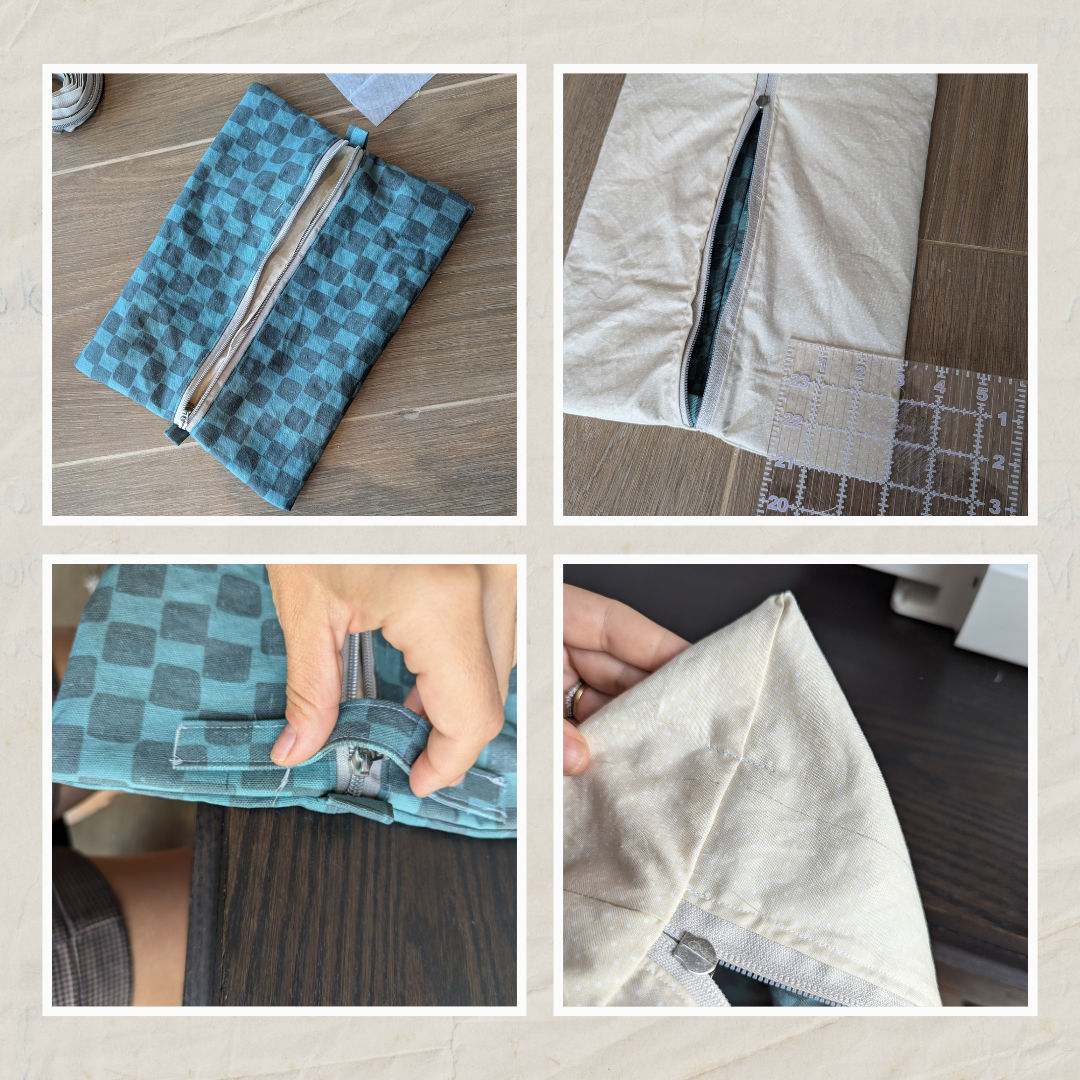
ATTACH ZIPPER TABS and SEW THE SIDES
6.- Take the fabric piece for the zipper tab and fold the two shorter edges toward the center so that they meet in the middle. This helps conceal the raw edges.
7.- Then, fold the entire piece in half again, encasing the raw edges inside and creating a clean finish.
9.- Place the folded zipper tab over the end of the zipper, sandwiching the zipper tape between the folded fabric layers.
10.- Pin or clip in place, then sew across the tab close to the zipper edge to secure it.
11.- Repeat on the other end of the zipper for a polished and professional finish.


Use the gap in the inside lining to turn your pouch inside out!
TURN INSIDE OUT!
12.- Flip the pouch inside out through the opening, and use a blunt tool to push out the corners for a clean finish. Hand-stitch the opening closed. We are almost there!
MAKING CORNERS
13.- Using a ruler and an erasable pen, mark 3x3-inch squares at each corner from the inside.
14. - Next, attach the fabric strip to one side, ensuring it extends beyond the 3-inch mark. Secure it by stitching both ends to the pouch.
15.- Then, with the pouch turned inside out, fold the marked corners so that the right sides of the fabric are touching (as shown in the image below). Sew a straight line across each folded corner to complete the shape.

LAST STEP!
16.- Handsew both of the corners in the same side to make a it a little compartment or pocket for your stand up toiletries! Voilà—you’re done!
Why You'll Love This Project
This square pouch is a fantastic way to showcase your favorite fabric designs or use up scraps from previous projects. It's versatile, customizable, and perfect for travel essentials, makeup, or small tools. Plus, making it yourself adds a personal, handmade touch that store-bought items can’t compete with.
If you create your own pouch using this tutorial, tag me in your photos on Instagram—I’d love to see your creations! 🌟
Ready to sew? Gather your supplies and get started today! Don't forget to check out more sewing tutorials on my blog for inspiration and guidance.

I know it looks like a lot of steps but I promise you it’s not that bad! My entire family loved them and stole half of them even before my market… I hope you love it as well!
Thank you for reading all the way! Let me know if you have any questions!
Happy Sewing,
Ana